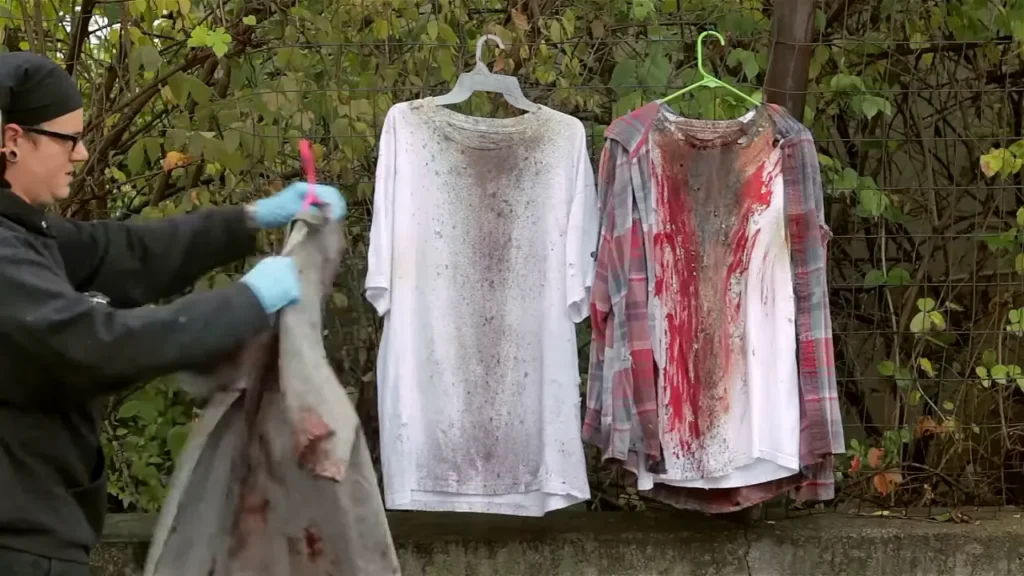
Zombie-themed attire has carved a niche in the realm of costume design, blending creativity with a tinge of horror. The process of transforming a regular shirt into a zombie-themed masterpiece is not just about crafting a costume; it’s an exploration of artistry and imagination. This transformation, accessible to anyone with basic materials, brings together the thrill of creative design and the spirit of Halloween or themed events.
Creating a zombie shirt involves more than just splattering fake blood on fabric. It’s an art that combines strategic ripping, distressing, and staining to evoke the eerie essence of a zombie. This process results in a shirt that looks like it has survived a zombie apocalypse, providing an authentic and visually striking piece for any costume.
In this journey of transformation, one discovers various techniques to age, distress, and stylize a shirt. From choosing the right type of fabric to understanding the nuances of applying fake blood and additional effects like dirt and grime, each step contributes to the authenticity of the final product. The techniques are simple yet impactful, turning an ordinary shirt into a statement piece that embodies the essence of a zombie.
## Introduction to DIY Zombie Shirts
Zombie-themed costumes have become a staple in both Halloween and horror-themed events, offering an exciting opportunity for creativity and self-expression. The centerpiece of such costumes is often the zombie shirt, a seemingly simple garment transformed into a work of art. This process of creating a DIY zombie shirt is not just about crafting a costume; it’s an adventure in artistic expression. By utilizing basic materials and simple techniques, anyone can turn an ordinary shirt into an extraordinary piece that captures the essence of a zombie apocalypse survivor.
## Overview of Materials and Techniques
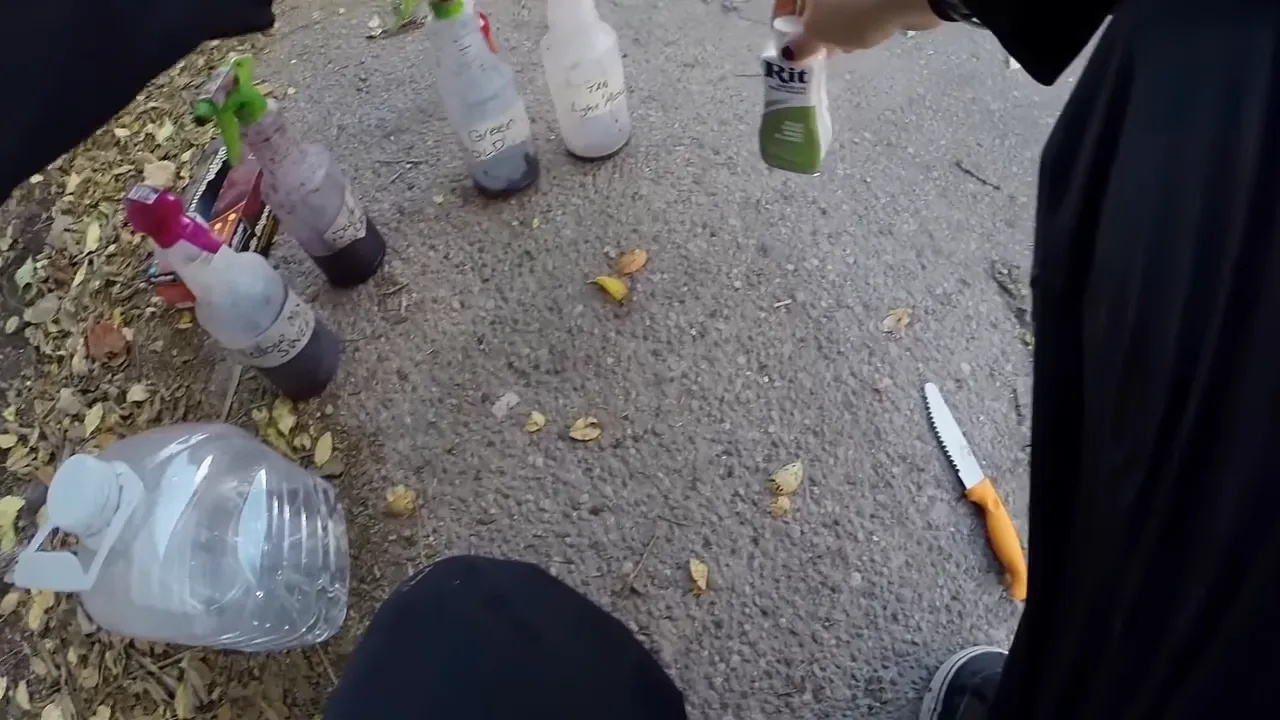
The process of making a zombie shirt requires a few basic materials, most of which can be found at home or purchased at a low cost. These include:
– **Shirt**: A cotton or cotton-blend shirt works best for absorbing color and distressing effects.
– **Fake Blood**: Homemade or store-bought, this is essential for the zombie look.
– **Distressing Tools**: Scissors, tweezers, sandpaper, and a lighter for burning effects.
– **Colorants**: Tea, coffee, and fabric dyes for aging the shirt.
The techniques involved in creating a zombie shirt are simple yet effective. They include ripping, tearing, burning, and applying fake blood and other colorants to achieve a worn, distressed, and bloody appearance.
## Choosing Your Shirt
### Types of Shirts Suitable for Zombie Effects
When selecting a shirt for your zombie costume, consider the following:
– **Fabric Type**: Cotton and cotton blends are preferable due to their absorbency and ease of distressing.
– **Color**: Lighter colors like white or grey show blood and aging effects more vividly.
### Preparing the Shirt for Transformation
Before starting the distressing process, wash the shirt to remove any sizing or finishes that could interfere with the effects. Avoid fabric softeners, as they can reduce the shirt’s ability to absorb colors and textures.
## Creating the Base Look
### Ripping and Tearing Techniques
To create a convincingly torn zombie shirt, follow these steps:
1. **Plan Your Rips**: Decide where the shirt will be most damaged – common areas include the sleeves, collar, and lower hem.
2. **Start Small**: Make initial cuts with scissors and then tear the fabric by hand for a more natural look.
3. **Vary the Tears**: Combine large rips with smaller ones and frayed edges for realism.
### Adding Burn Effects for Realism
Burn effects can add a dramatic touch to your zombie shirt:
– **Safety First**: Always work in a well-ventilated area and keep water nearby for safety.
– **Technique**: Lightly singe the edges of rips or holes with a lighter. Do not let the flame linger to avoid large burns or fire hazards.
## Mixing Fake Blood
### Ingredients for Homemade Fake Blood
A simple recipe for fake blood includes:
– **Corn Syrup**: Acts as the base, giving a thick, blood-like consistency.
– **Red Food Coloring**: Provides the primary blood color.
– **Blue or Green Food Coloring**: Adds depth to the red, making it more realistic.
– **Water**: To adjust the thickness as needed.
### Safe and Easy Mixing Methods
Mix the ingredients in a bowl, starting with the corn syrup and red food coloring. Add a drop of blue or green to achieve a more realistic shade. Adjust the consistency with water if necessary. Always test the mixture on a small fabric scrap first.
## Applying Fake Blood
The application of fake blood is a crucial step in creating a realistic zombie shirt. This process involves more than just randomly splattering blood; it requires a thoughtful approach to mimic the patterns and consistency of real blood stains.
### Techniques for Realistic Blood Stains
To achieve the most authentic look, consider the following techniques:
– **Drip and Splatter**: Hold the brush or sponge above the shirt and allow the blood to drip naturally. For a splattered effect, flick the brush bristles.
– **Handprints and Smears**: Use gloved hands to create handprints or drag fingers across the fabric to simulate smears.
– **Layering**: Apply multiple layers of blood, letting each layer dry slightly before adding the next, for a more dimensional and varied look.
### Drying and Setting the Blood Effect
Once you have applied the fake blood, the next step is to set it properly:
– **Air Dry**: Allow the shirt to dry naturally. This could take several hours depending on the amount of fake blood used.
– **Heat Setting**: To further ensure the blood stays in place, use a hair dryer on a low heat setting or iron the shirt on a low heat setting with a protective cloth between the iron and the shirt.
## Adding Additional Effects
To enhance the realism of your zombie shirt, consider adding other effects such as dirt, grime, and optional extras.
### Dirt and Grime for Authenticity
Adding dirt and grime can give your shirt an aged and worn look:
– **Applying Dirt**: Rub in a mixture of brown fabric paint or makeup for a dirty appearance.
– **Creating Grime**: Dilute black or dark brown paint and apply it in areas that would naturally accumulate dirt.
### Optional: Sewing in Extras for Enhanced Effect
For an even more elaborate zombie shirt:
– **Materials**: Consider adding patches of different fabrics, fake bones, or plastic insects.
– **Sewing Techniques**: Attach these extras with rough stitches for a haphazard, makeshift look.
## Finishing Touches
The final touches are what will set your zombie shirt apart, giving it a complete and polished look.
### Final Aging and Distressing Techniques
– **Aged Look**: Use a tea or coffee soak to give the shirt an old, stained appearance.
– **Additional Distressing**: Further fray edges or add small holes to enhance the worn-out effect.
## Caring for Your Zombie Shirt
Maintaining the quality and appearance of your zombie shirt requires proper care.
– **Washing Instructions**: Hand wash gently in cold water and air dry. Avoid machine washing and harsh detergents.
– **Storage**: Store the shirt in a dry place away from direct sunlight to prevent fading.
## Styling Tips for Your Zombie Shirt
Crafting a zombie shirt is just the beginning of creating a memorable costume. The real magic lies in how you style it. Coordination with other costume elements and thoughtful accessorizing can elevate your zombie attire from simple to spectacular.
### Coordinating the Zombie Shirt with Costumes
A well-coordinated costume is key to creating a believable and impressive zombie look. Consider these aspects:
– **Color Coordination**: While your zombie shirt may be the centerpiece, ensure the rest of your costume complements its color scheme. Muted, earthy tones typically work well.
– **Layering**: Zombies are often depicted in disheveled, layered clothing. Pair your shirt with torn pants or skirts, and add jackets or vests for depth.
– **Accessories**: Select accessories that enhance the undead theme. This could include fake wounds, zombie makeup, tattered hats, or gloves.
### Ideas for Complete Zombie Outfits
To make your zombie costume truly stand out, think about the overall theme and character you want to portray. Here are some ideas:
– **Classic Zombie**: Pair your shirt with ripped jeans, disheveled hair, and pale, gory makeup.
– **Zombie Professional**: Dress as a zombie version of a doctor, police officer, or other professional, using the corresponding uniform along with your zombie shirt.
– **Historical Zombie**: Take inspiration from historical attire, adding your zombie shirt to a Victorian dress or a soldier’s uniform.
## Safety Precautions in DIY Zombie Shirt Making
Safety should always be a priority when working with various materials and tools in DIY projects.
### Handling Materials Safely
– **Sharp Tools**: Use scissors and other sharp tools with care. Store them safely away from children.
– **Heat Sources**: When using lighters or matches for burning effects, work in a well-ventilated area and keep a fire extinguisher or water nearby.
– **Chemicals and Dyes**: Use gloves when handling dyes or chemicals to protect your skin.
### Tips for Avoiding Stains and Damage
– **Work Area Preparation**: Cover your work area with newspapers or a plastic sheet to protect surfaces from stains.
– **Clothing**: Wear old clothes that you don’t mind getting stained or damaged.
– **Testing Products**: Always test dyes, fake blood, and other materials on a small, inconspicuous area of the shirt first.
## Recap of Key Steps in Creating a Zombie Shirt

Creating a zombie shirt is a multi-step process that involves careful planning and execution. Here’s a quick recap of the key steps:
– **Selecting the Shirt**: Choose a suitable shirt, preferably cotton, in light colors.
– **Distressing Techniques**: Use ripping, tearing, and burning techniques for a worn look.
– **Applying Fake Blood**: Mix and apply fake blood for a realistic effect.
– **Additional Effects**: Add dirt, grime, and optional extras like sewing in patches or fake bones.
– **Final Touches**: Age the shirt further with tea or coffee and add final distressing details.
## Encouraging Creativity and Personal Touches
The beauty of creating a DIY zombie shirt lies in the freedom to infuse your personal creativity and style. Each shirt is unique, reflecting the maker’s vision and artistic flair. Here are some ways to add your personal touch:
– **Personal Story**: Consider creating a backstory for your zombie character. This can guide your choices in styling and detailing.
– **Mix and Match**: Don’t be afraid to combine different materials and textures. Experiment with layers, accessories, and makeup.
– **Innovative Techniques**: Explore new distressing techniques or materials to make your shirt stand out.
How to make clothes into zombie clothes?

Transforming regular clothes into zombie attire is a creative process that combines distressing, staining, and a bit of theatrical flair. Here’s a step-by-step guide to turning your clothes into zombie-worthy wear:
1. **Choose Your Clothes**: Start with garments that are easy to work with. Cotton and natural fibers are ideal because they absorb liquids like fake blood well. Choose light colors like white or gray to make the blood and distressing stand out.
2. **Distress the Fabric**: Begin by creating tears, rips, and holes in your clothes. Use scissors for initial cuts and then tear the fabric by hand for a more natural, worn-out look. Focus on areas that would naturally get worn out, like knees, elbows, and hems. You can also use sandpaper or a cheese grater to create a frayed, aged appearance.
3. **Burn Effects (Optional)**: For an added touch of realism, you can carefully singe some areas of the clothing using a lighter or a match. Always do this in a well-ventilated area and keep water nearby as a safety precaution. Remember, this step is optional and must be done with utmost care.
4. **Apply Fake Blood**: Fake blood is essential for the zombie look. You can buy it from a store or make your own using corn syrup and red food coloring, with a touch of blue or green to darken the shade. Splatter, smear, and drip the blood onto your clothes to create realistic stains. Use a brush or your hands (wearing gloves) for different effects.
5. **Add Dirt and Grime**: To make your clothes look like they’ve been through an apocalypse, rub in dirt, soot, or brown and green makeup. Focus on areas that would naturally accumulate dirt, such as the hem, cuffs, and pockets.
6. **Age Your Clothes**: For an aged, weathered look, soak your clothes in a mixture of water and black tea or coffee. This gives them a stained, faded appearance.
7. **Set the Blood and Stains**: Once you’re satisfied with the look, let the clothes dry completely. You can set the fake blood by ironing over the stains with a warm iron (place a cloth between the iron and the clothes).
8. **Accessorize**: Complete your zombie outfit with accessories. Tattered hats, gloves, and shoes can enhance your costume.
Remember, the key to a great zombie costume is creativity and experimentation. There’s no right or wrong way to create zombie clothes, so feel free to try different techniques and see what works best for you. The goal is to have fun and create an outfit that’s uniquely yours.
### FAQs
#### What Type of Shirt is Best for a Zombie Costume?
For a zombie costume, it’s ideal to choose a cotton shirt as it absorbs and retains the fake blood and distressing effects well. Opt for light colors like white or grey to make the blood and aging effects more prominent.
#### How Can I Make Fake Blood for My Zombie Shirt?
You can create fake blood using a mixture of corn syrup, water, and red food coloring. Adjust the thickness by varying the amount of corn syrup and water, and darken the color with a drop or two of blue or green food coloring for realism.
#### What Techniques Can I Use to Age My Zombie Shirt?
Aging your zombie shirt can be done by applying a mixture of tea or coffee for a dirty, aged look. Ripping, tearing, and using sandpaper are effective for creating a worn-out appearance.
#### How Do I Set the Fake Blood So It Doesn’t Wash Out?
After applying the fake blood, let the shirt dry completely. To set the blood, you can use a heat setting method like ironing on a low setting or using a hairdryer.
#### Can I Wash My Zombie Shirt After Applying the Effects?
Yes, but hand wash gently and avoid vigorous scrubbing or machine wash. Washing might slightly fade the effects, adding to the authenticity of an aged, distressed zombie shirt.
### Conclusion
Transforming a simple shirt into a zombie-themed costume piece is an engaging and rewarding process. It allows for the expression of creativity and the enjoyment of crafting a unique piece of wearable art. This article provides a guide for anyone looking to delve into this imaginative endeavor, offering step-by-step instructions and tips for achieving the best results.
The key to a successful zombie shirt lies in the attention to detail and the willingness to experiment. Each rip, stain, and smudge contributes to the overall effect, making your creation a standout at any event or gathering. Remember, the beauty of this project lies in its imperfections; each flaw adds to the authenticity of the zombie look.
Finally, this artistic journey is more than just a costume creation; it’s a celebration of individuality and artistic expression. Whether for Halloween, a themed party, or just for fun, a handmade zombie shirt is a testament to the joy of DIY and the endless possibilities of transformation. So grab your materials, unleash your creativity, and embark on this exciting adventure of turning the ordinary into the extraordinarily undead.


