Temporary tattoos are a fantastic way to experiment with body art without the permanence of traditional tattoos. They offer a versatile and creative outlet for those looking to express themselves through skin art. However, the common practice of using rubbing alcohol in the application of temporary tattoos can pose risks, especially for sensitive skin.
Making a temporary tattoo without rubbing alcohol involves simple, skin-safe methods. You can use household items like eyeliner, paper, and pencils to create stunning, temporary designs. These methods not only ensure safety but also provide an opportunity for creativity and personalization.
The allure of temporary tattoos lies in their flexibility and harmlessness. They are perfect for those who desire a temporary dash of style or wish to test a design before committing to a permanent tattoo. Using alcohol-free methods enhances the appeal, offering a safe alternative for all skin types, especially for individuals with sensitive skin or those looking for a child-friendly option.
# Importance of Safe and Easy Methods in Temporary Tattoos
When it comes to adorning the skin with temporary tattoos, safety and ease of application are paramount. Tattoos, temporary or permanent, are not just about aesthetics; they also involve the health and well-being of the skin. For those who enjoy the artistry of body art without the commitment of permanent ink, temporary tattoos offer an excellent alternative. However, it’s essential to ensure that these temporary applications are safe, especially for sensitive skin types, and easy to apply for all ages.
# Temporary Tattoo Basics
## Definition and Types of Temporary Tattoos
Temporary tattoos are non-permanent images on the skin that resemble real tattoos. They can be drawn, painted, or airbrushed, but unlike permanent tattoos, they do not last forever. There are several types:
– **Sticker Tattoos**: These are applied with water and last a few days.
– **Henna Tattoos**: Made from the henna plant, these last up to a few weeks.
– **Airbrush Tattoos**: Applied using an airbrush and stencils.
– **Glitter Tattoos**: Using a stencil, adhesive, and glitter for a sparkling effect.
– **Inkbox Tattoos**: A semi-permanent tattoo that lasts 1-2 weeks.
## Brief History and Popularity
Temporary tattoos have a rich history, with henna art dating back thousands of years in cultures across the Middle East, Africa, and South Asia. In recent years, they have surged in popularity in Western cultures as well. This rise can be attributed to their non-permanent nature, allowing individuals to experiment with body art without long-term commitment or the pain associated with permanent tattoos. Additionally, temporary tattoos have become a popular tool in fashion and marketing, used in advertising and as fashion accessories.
# Why Avoid Rubbing Alcohol?
## Common Use of Rubbing Alcohol in Temporary Tattoos
Rubbing alcohol is often used in the application and setting of temporary tattoos due to its ability to clean the skin and help transfer designs. It’s also used in the removal process for certain types of temporary tattoos.
## Potential Risks and Alternatives
However, rubbing alcohol can be harsh, particularly for those with sensitive skin, leading to irritation or allergic reactions. Moreover, its strong scent and chemical composition make it unsuitable for use on children. As a result, finding alternatives that are gentle yet effective is crucial.
# Materials for Alcohol-Free Temporary Tattoos
## List of Necessary Items
To create temporary tattoos without the use of rubbing alcohol, you will need:
– **Pencil or Eyeliner**: For drawing the design.
– **Stencil Paper**: If you’re not comfortable free-handing.
– **Makeup Brushes**: For finer details.
– **Hair Spray or Clear Nail Polish**: To set the tattoo.
– **Cotton Swabs and Cleansing Wipes**: For correcting mistakes and cleaning the skin.
## Safe and Accessible Alternatives to Rubbing Alcohol
Instead of using rubbing alcohol, consider these alternatives:
– **Soap and Water**: To clean the skin before application.
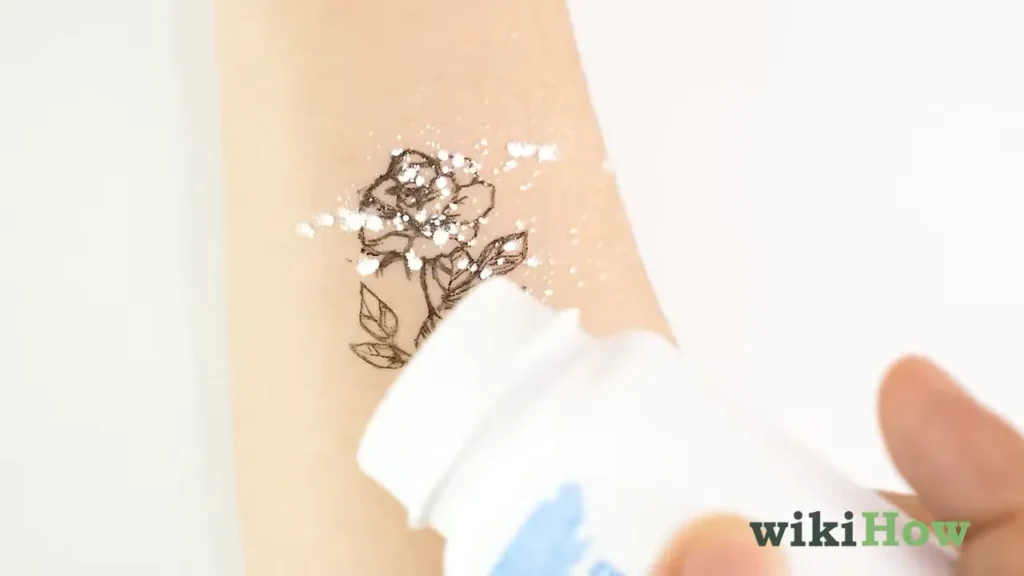
– **Baby Powder**: Helps to set the tattoo.
– **Makeup Setting Spray**: A gentle alternative to hair spray.
– **Body Lotion**: To smoothen the area before drawing.
# Preparing Your Skin for Temporary Tattoos
## Steps for Skin Preparation
Before applying a temporary tattoo, it’s crucial to prepare your skin properly. This preparation ensures that the tattoo adheres well and lasts longer. Follow these steps:
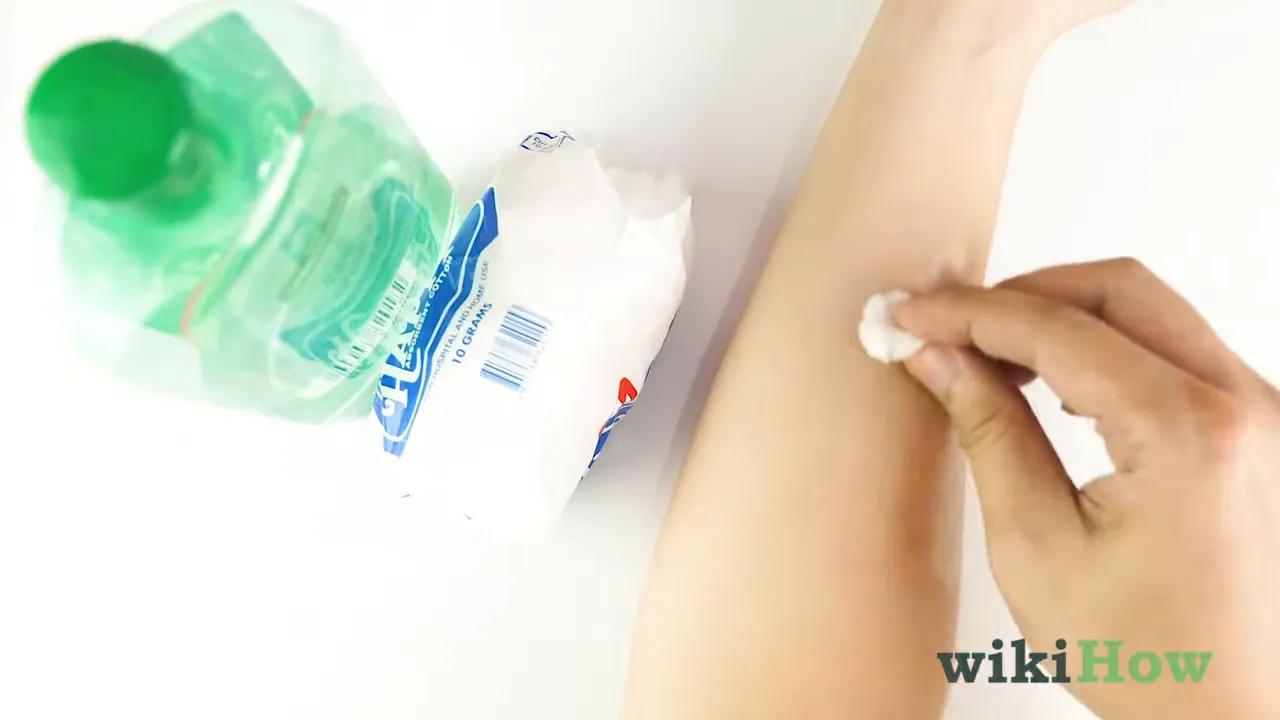
1. **Cleanse the Skin**: Use mild soap and water to clean the area where you plan to apply the tattoo. This step removes oils, dirt, and sweat that could prevent the tattoo from adhering properly.
2. **Dry the Area Thoroughly**: Pat the skin dry with a clean towel. Any moisture left on the skin can affect the tattoo’s application.
3. **Exfoliate Gently (Optional)**: For areas with thicker skin, like the arms or legs, a gentle exfoliation can help in removing dead skin cells, providing a smoother canvas for the tattoo.
4. **Apply a Light Moisturizer**: If your skin is particularly dry, apply a small amount of moisturizer and let it absorb fully. This helps in preventing cracks in the tattoo.
## Importance of Cleanliness and Safety
Cleanliness is not just about the tattoo’s longevity; it’s also about skin health. Using dirty tools or applying a tattoo on unclean skin can lead to skin irritations or infections. Safety is another crucial aspect, especially when using products not specifically designed for skin application. Always test products on a small skin area to check for allergic reactions.
# Choosing the Right Design for Your Temporary Tattoo
## Tips for Selecting a Tattoo Design
Selecting the right design is a crucial part of the temporary tattoo process. Consider these tips:
– **Reflect Your Personality**: Choose a design that resonates with your personality or holds meaning to you.
– **Research Designs**: Look at various designs online or in tattoo parlors to get inspiration.
– **Size Matters**: Consider the size of the design in relation to the area where you’ll place it.
## Considerations for Placement and Size
Placement and size are crucial for the tattoo’s aesthetic appeal. Think about:
– **Visibility**: Do you want it to be prominently visible or more discreet?
– **Body Contours**: Some areas may stretch or distort the design.
– **Pain Sensitivity**: Certain areas are more sensitive, which might be a consideration for some temporary tattoo methods.
# Method 1: Stencil and Eyeliner Technique
## Step-by-Step Guide
This method is ideal for beginners and requires minimal materials:
1. **Create or Obtain a Stencil**: You can draw your design on stencil paper or print one.
2. **Position the Stencil**: Place it on the prepared skin area.
3. **Trace the Design**: Use an eyeliner pencil to trace over the design.
4. **Fill in the Tattoo**: Once the outline is done, fill in the design.
## Tips for Precision and Longevity
– **Use a Fine-Tipped Eyeliner**: This allows for more detailed work.
– **Apply Setting Powder or Spray**: This helps in setting the design and preventing smudging.
# Enhancing Durability of Temporary Tattoos
## Techniques to Make the Tattoo Last Longer
– **Avoid Contact with Water**: Keep the tattooed area dry as much as possible.
– **Apply a Thin Layer of Hair Spray**: This can help seal the design.
– **Touch-Up as Needed**: Reapply eyeliner to faded areas.
## Safe Products to Use
– **Makeup Setting Spray**: A gentle alternative for setting the tattoo.
– **Clear Nail Polish**: Apply a thin layer over the tattoo for added durability.
# Method 2: Paper and Pencil Transfer
## Detailed Instructions
This method involves transferring a design drawn on paper:
1. **Draw the Design**: Use a pencil to draw your tattoo on tracing paper.
2. **Wet the Skin**: Use a damp cloth to moisten the area.
3. **Place the Design**: Press the paper, pencil side down, onto the skin.
4. **Apply Pressure**: Hold firmly for about 30 seconds.
5. **Peel Away the Paper**: Do this gently to reveal the transferred design.
## How to Ensure a Clear Transfer
– **Use a Dark Pencil**: This ensures the design is clearly visible.
– **Apply Even Pressure**: This helps in transferring the entire design uniformly.
## Troubleshooting Transfer Issues
### Common Problems and Solutions
– **Incomplete Transfer**: Re-wet the skin and reapply the paper, pressing down more firmly.
– **Smudging**: Use a cotton swab to gently correct any smudges.
### Ensuring a Crisp, Clean Tattoo Image
– **Use Fresh Paper**: Old or crinkled paper might not transfer well.
– **Practice the Design**: Familiarity with the design helps in a cleaner transfer.
# Method 3: Using Printed Designs
## Process of Using Printed Tattoo Designs
Printed designs are great for intricate tattoos:
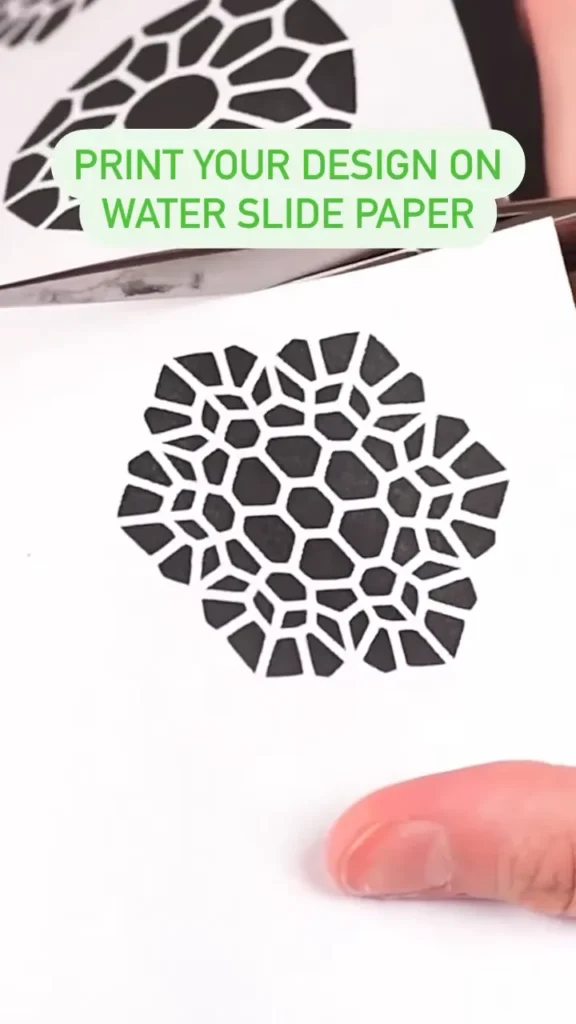
1. **Choose and Print the Design**: Find a design online and print it on temporary tattoo paper.
2. **Cut Out the Design**: Trim around the design, leaving a small border.
3. **Peel Off the Backing**: Carefully peel away the protective layer.
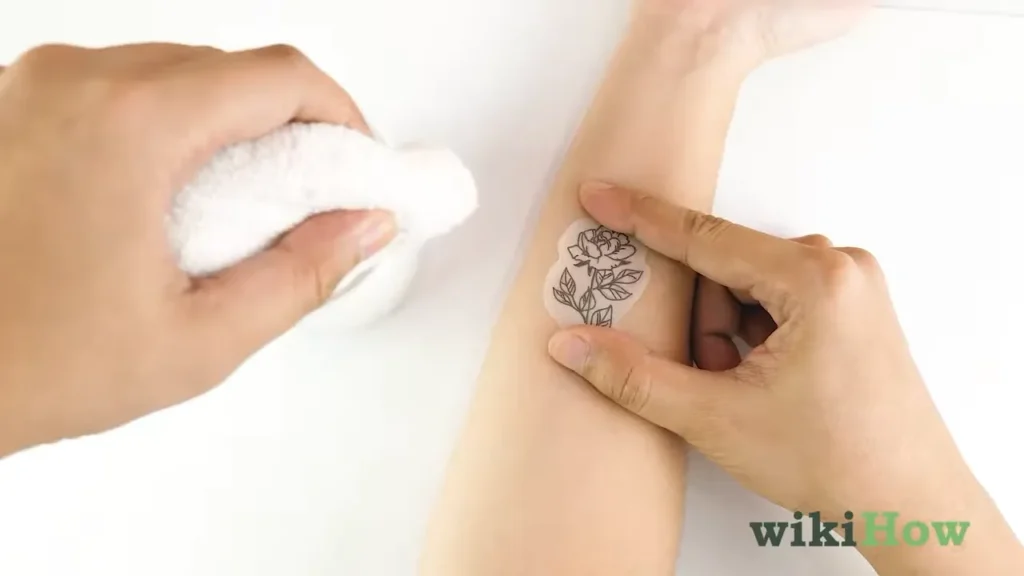
4. **Apply to the Skin**: Place the design face down on your prepared skin.
5. **Dampen the Paper**: Use a wet cloth to thoroughly moisten the back of the paper.
6. **Press and Hold**: Apply pressure evenly for about 30 seconds.
7. **Peel off the Paper**: Gently remove the paper to reveal the design.
## Customization Options
– **Edit Before Printing**: Use photo editing software to tweak the design to your preference.
– **Mix and Match**: Combine different designs to create a unique tattoo.
In using printed designs, ensure that the printer ink is safe for skin contact. Always do a patch test to check for any allergic reactions. This method allows for a high degree of detail and is excellent for those who want a more professional-looking temporary tattoo.
Each of these methods provides a unique way to enjoy temporary tattoos safely and creatively. Whether you prefer the simplicity of the stencil and eyeliner technique, the traditional feel of the paper and pencil transfer, or the precision of using printed designs, there’s a method to suit everyone’s needs. Remember, the key to a successful temporary tattoo is in the preparation, application, and aftercare. With these techniques, you can enjoy the art of temporary tattoos without any worry, experimenting with different designs as often as you like.
# Applying the Printed Tattoo
## Step-by-Step Application Process
Applying a printed temporary tattoo involves a straightforward yet meticulous process. By following these steps, you can ensure a smooth and even application:
1. **Prepare the Skin**: Clean and dry the skin area where the tattoo will be applied.
2. **Position the Tattoo**: Carefully place the tattoo design, ink side down, on the skin.
3. **Dampen the Paper**: Use a wet sponge or cloth to moisten the back of the tattoo paper. Ensure the paper is thoroughly wet.
4. **Apply Pressure**: Press down firmly and evenly across the entire tattoo for about 30 seconds.
5. **Peel Off the Paper**: Slowly and gently peel away the paper. If the tattoo hasn’t transferred completely, press down again and wet the paper more.
6. **Let Dry**: Allow the tattoo to dry completely without touching it for a few minutes.
## Tips for Smooth and Even Application
– **Avoid Stretching the Skin**: Keep the skin relaxed to prevent distortion.
– **Wet the Paper Thoroughly**: This helps in transferring the ink uniformly.
– **Peel Slowly**: Rushing this step can cause tearing or incomplete transfer.
# Aftercare and Maintenance
## How to Care for Your Temporary Tattoo
Proper aftercare is essential to maintain the appearance and longevity of your temporary tattoo:
– **Avoid Water**: Keep the tattoo dry, especially within the first few hours of application.
– **Gentle Cleansing**: If you need to clean the area, use a damp cloth gently.
– **Moisturize**: Lightly apply lotion around the tattoo, not directly on it, to keep the skin hydrated.
## Ways to Extend the Life of Your Tattoo
– **Avoid Friction**: Wear loose clothing over the tattoo and avoid rubbing the area.
– **Touch-Up**: Use a similar eyeliner or ink to touch up any fading parts.
– **Setting Spray**: A makeup setting spray can help in preserving the design.
# Removing Your Temporary Tattoo
## Safe and Easy Removal Methods
When it’s time to remove your temporary tattoo, it’s important to do it safely:
– **Oil-Based Removers**: Apply baby oil or olive oil on the tattoo and gently rub it off.
– **Tape Method**: Use a piece of adhesive tape to lift the ink from the skin.
– **Alcohol-Free Wipes**: Use gentle, alcohol-free cleansing wipes for sensitive skin.
## Products and Home Remedies
– **Makeup Remover**: A gentle, oil-based makeup remover can effectively dissolve the ink.
– **Warm Water and Soap**: This method works well for tattoos that have started to fade.
# Skin Care Post-Removal
## Tips for Skin Care After Tattoo Removal
Proper skin care after tattoo removal is crucial:
– **Moisturize the Area**: Apply a soothing moisturizer to replenish the skin.
– **Check for Irritation**: If the skin is irritated, use a gentle, hypoallergenic product.
– **Sun Protection**: If the tattooed area has been exposed to the sun, apply sunscreen to protect the skin.
## Avoiding Irritation and Ensuring Skin Health
– **Gentle Removal**: Avoid scrubbing the skin harshly.
– **Hydration**: Keep the skin hydrated internally and externally.
# Alternative Temporary Tattoo Methods
## Overview of Other Alcohol-Free Methods
Exploring other alcohol-free methods for temporary tattoos opens up a variety of creative options:
– **Body Paints**: Non-toxic body paints are great for larger, more colorful designs.
– **Natural Dyes**: Ingredients like turmeric or beetroot can be used for natural color.
– **Decal Tattoos**: Similar to sticker tattoos but often with more intricate designs.
## Brief Description and Suitability
Each method has its unique appeal and suitability:
– **Body Paints**: Ideal for events like festivals or parties.
– **Natural Dyes**: Best for those looking for organic and skin-friendly options.
– **Decal Tattoos**: Perfect for quick, detailed designs, especially for kids.
# Recap of Key Points
Throughout this article, we’ve explored various methods to create and maintain temporary tattoos without the use of rubbing alcohol. From the basic steps of skin preparation to the intricate details of applying printed designs, each method offers a safe and effective way to enjoy temporary body art.
## Encouragement to Try Alcohol-Free Temporary Tattoos
I encourage everyone to try these alcohol-free methods. They not only ensure safety, especially for those with sensitive skin, but also open up a realm of creativity and personal expression. Whether you’re a first-timer or a seasoned temporary tattoo enthusiast, these methods are worth exploring. They provide a fun, non-permanent way to express your style and personality through body art. So go ahead, choose a design, and enjoy the art of temporary tattoos!
# Frequently Asked Questions
### Can I Make a Temporary Tattoo Last Longer?
Yes, to extend the lifespan of your temporary tattoo, keep the area dry and avoid friction. Applying a thin layer of clear nail polish or hair spray over the tattoo can also help seal the design and prolong its appearance.
### Is It Safe to Use Eyeliner for Temporary Tattoos?
Absolutely! Using eyeliner is a safe and effective way to create temporary tattoos. Just ensure that the eyeliner is non-toxic and skin-friendly, especially if you have sensitive skin.
### Can These Methods Be Used on All Skin Types?
Yes, these alcohol-free methods are suitable for all skin types. They are particularly beneficial for sensitive skin, as they avoid harsh chemicals found in some commercial temporary tattoo methods.
### How Do I Remove a Temporary Tattoo Without Rubbing Alcohol?
You can remove a temporary tattoo without rubbing alcohol by gently scrubbing the area with soap and warm water. Oil-based products like baby oil or coconut oil can also help dissolve the tattoo.
# Conclusion
Temporary tattoos offer a unique blend of style and flexibility, allowing individuals to explore artistic designs without long-term commitment. The methods discussed in this article provide safe, easy, and creative ways to enjoy temporary tattoos without the need for rubbing alcohol. They cater to all ages and skin types, making them a universally appealing option.
The beauty of these methods lies in their simplicity and accessibility. Using everyday items to create personalized tattoos not only ensures safety but also encourages creativity and personal expression. Whether you’re preparing for a special event or just experimenting with designs, these techniques offer a practical and enjoyable way to adorn your skin.
In conclusion, embracing alcohol-free temporary tattoo methods opens up a world of artistic possibilities, free from the concerns of skin irritation and safety. These methods stand as a testament to the innovative, inclusive, and health-conscious approaches in the realm of temporary body art.